
Why You Need a WordPress Staging Site
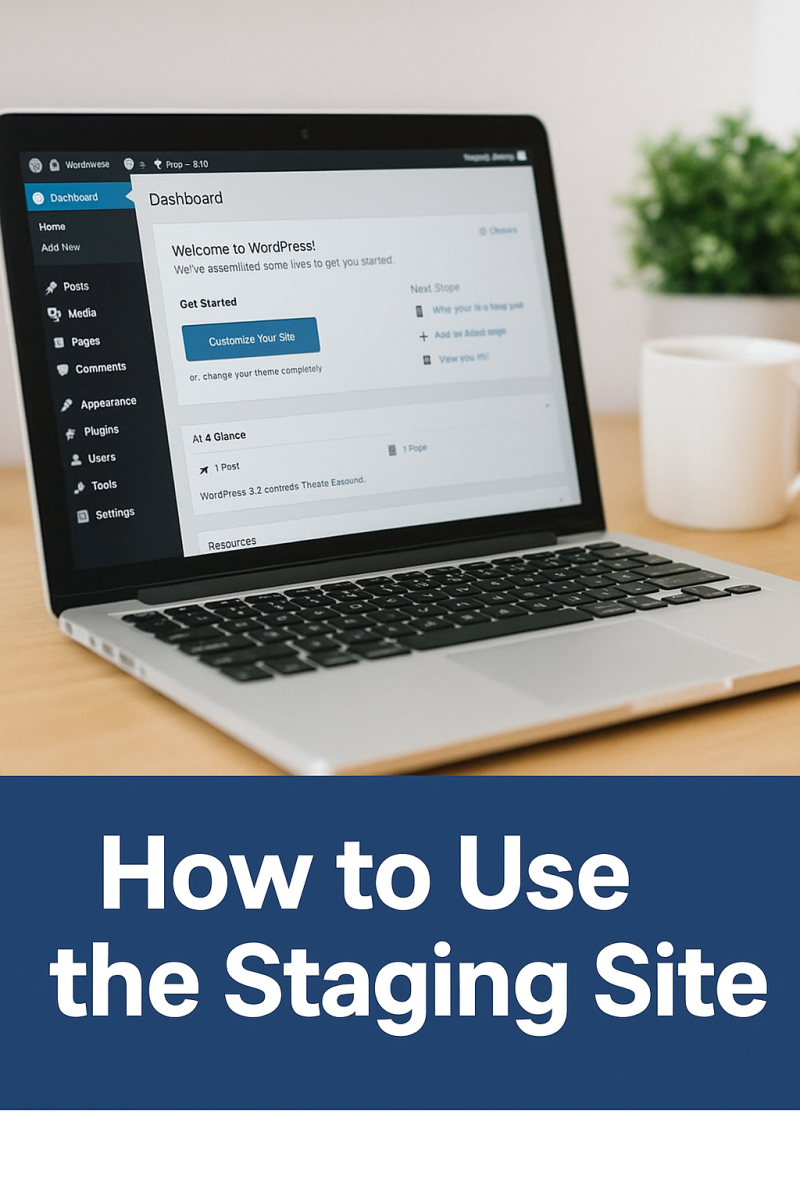
Managing a WordPress website can be exciting, but it also comes with risks. One wrong plugin update or theme change can break your live site. That’s where a WordPress staging site comes in. A staging site is a safe environment where you can test updates, plugins, or design changes without affecting your live website.
Pro tip: Using a staging site regularly will protect your website, maintain your professional authority, and help you experiment with confidence.
What is a WordPress Staging Site?
A WordPress staging site is a clone of your live website that exists in a separate environment. It includes:
- All pages and posts
- Plugins and themes
- Settings and configurations
The staging site allows you to make changes without risking errors or downtime on your live site. Most managed hosting providers, like SiteGround, offer one-click staging environments to simplify this process.
Benefits of Using a WordPress Staging Site
1. Prevent Errors on Your Live Site
Testing updates, plugins, or themes on a live website can cause crashes. A staging site provides a risk-free environment for experimentation.
2. Test Plugins and Features Safely
Installing new plugins can sometimes conflict with your existing setup. On a staging site, you can:
- Test compatibility
- Configure settings
- Ensure plugins don’t break your site
3. Experiment With Design Changes
Redesigning your site? The staging site lets you:
- Test new layouts, colors, and fonts
- Preview pages without affecting live users
- Evaluate user experience changes before launch
4. Build Authority and Credibility
For bloggers or businesses, a professional website is crucial. A staging site ensures your site remains functional and polished, helping you maintain credibility in your niche.
Recommended image: Before and after screenshot of a design change on staging vs live
Alt text: WordPress staging site showing design changes before live publishing
How WordPress Staging Sites Work
When a staging site is created, your hosting provider generates a separate URL that mirrors your live website. All links, media, posts, and settings are replicated.
Changes you make here do not affect your live site until you push them live. Most hosts allow selective syncing, so you can push only the updates you need.
When you have a staging site all setup it’s literally a safe sandbox to test things out knowing you won’t break your published live site. You can also add plugins to your staged site which can be transferred over to your live site it all things workout great! Here are 9 Must-Have Plugins for WordPress Bloggers that I believe you should always have in your staging site as well as your published live site.
Step-by-Step Guide to Using a WordPress Staging Site
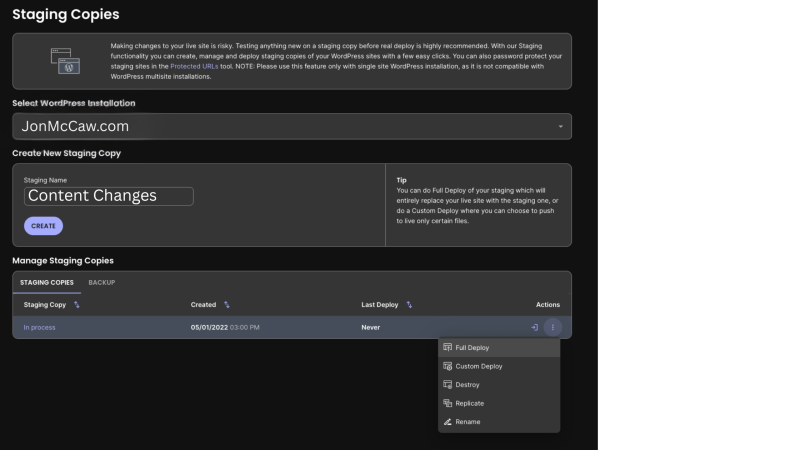
Step 1: Create the Staging Environment
- Log in to your hosting account (SiteGround, GoDaddy, or similar).
- Navigate to the WordPress management section.
- Click “Create Staging” or “Staging Site”.
- Wait for the system to clone your website.
Step 2: Test Your Staging Site
- Open the staging URL.
- Check pages, posts, media, and links.
- Verify forms and dynamic content.
Step 3: Make Updates or Changes
- Update plugins, themes, or WordPress core.
- Add new content or features.
- Test custom code or layouts.
Step 4: Sync Changes to Live Site
- Once everything is verified, push changes to the live site.
- Some hosts allow selective syncing (e.g., plugins only).
- Tip: Backup your live site before syncing.
Practical Tips for Staging Sites
- Use Staging Regularly – Test every update or major change.
- Test Thoroughly – Check internal/external links, forms, and page speed.
- Backup First – Always backup the live site before pushing changes.
- Test Plugins – Update plugins first on staging before applying on live.
- Optimize for SEO – Test redirects, structured data, and SEO plugins on staging.
If you have questions about SEO, your best bet is to go to the horses mouth and read the WordPress SEO guide for SEO best practices.
Manage Multiple WordPress Sites on SiteGround
Running more than one WordPress site? A WordPress staging site is the safest way to test changes before going live. With SiteGround, you can:
- Spin up a staging site for each website in seconds
- Auto-update plugins, themes, and WordPress core without risk
- Track performance and uptime across all your sites from one dashboard
SiteGround’s built-in staging makes it easy to manage multiple websites confidently—without downtime or broken features.
Site Uptime Guarantee
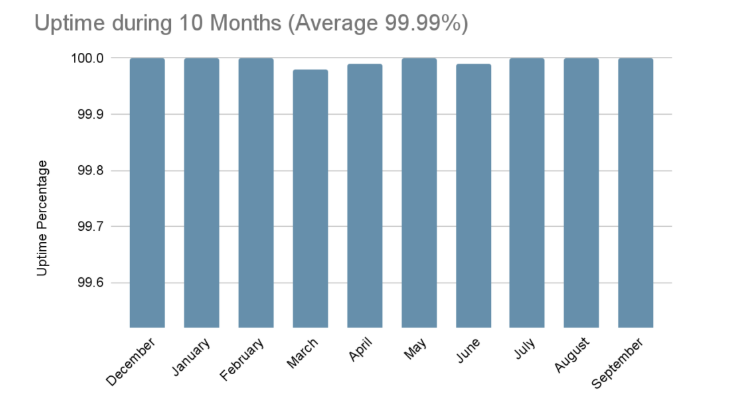
A staging site complements your hosting’s uptime guarantee. For example, SiteGround guarantees 99.9% uptime, meaning your live site is almost always accessible. Testing updates in staging helps avoid accidental downtime.
How Staging Improves Website Authority
Using a staging site ensures:
- Professional, error-free content
- Fully functional plugins and forms
- Safe design and content updates
This builds trust with your audience and strengthens your authority in your niche.
Conclusion
A WordPress staging site is an essential tool for website owners. It allows you to:
- Test updates and plugins safely
- Experiment with design changes
- Maintain a professional, credible online presence
Whether you’re a blogger, business owner, or marketer, a staging site is one of the smartest investments for long-term website success.
Next Step: Check out my blog post on Best Plugins for WordPress Bloggers to optimize your site for performance, SEO, and user engagement.